
Updating Verification Lists?
Step-by-step guide for creating and maintaining Verification Lists in SiCompounding.
Overview
Verification Lists are created for Quality Assurance to ensure that a process (Compounding, Master Formula, Patients, etc.) has been verified before continuing. Each verification list contains a series of verification steps that must be completed, signed off, and tracked for regulatory and operational compliance.
Navigation Path
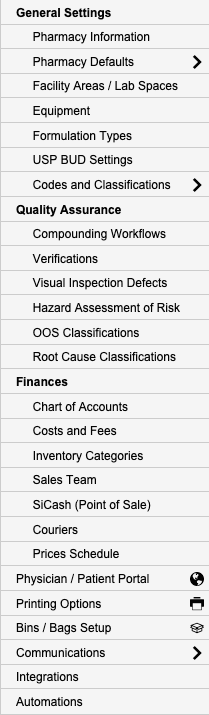
Settings → Quality Assurance → Verifications
Step-by-Step Instructions
Open FileMaker Pro
- Click the FileMaker Pro icon on your computer to launch FileMaker.
- When FileMaker opens, locate the large menu bar on the left side of the window.
- Click SiCompounding (near the top of the menu).
- In the next window, several icons will appear across the middle of the screen.
- Click Pharmacy to open the Pharmacy Dashboard.
- From the blue sidebar menu on the left side:
- Scroll to the bottom.
- Select Settings.
Navigate to Verifications
- Under Quality Assurance, select Verifications.
- The Quality Assurance / Verifications window opens, displaying existing Verification Lists and their related verification steps.

Verification List Features
The Verifications window includes these controls:
- Allow Verify All — Slider toggle (Grey → Green) that allows users to verify all steps at once instead of individually.
- Duplicate Button — Quickly duplicate an existing Verification List for reuse with a new name.
Create a New Verification List
-
To the right of Verification Lists, click + Verification List to create a new list.

-
The Verifications window opens. Fill in the following fields:

Field Description Short Name Abbreviated name for the verification list Verification Name Full name of the verification list Status Choose Active or Inactive from dropdown Field List - Table Select from dropdown list of tables; all related fields display after selection -
Click Save to create the list, Delete List to remove it, or Cancel to discard changes.
-
Click the Pencil Icon
 to make additional changes for only user created lists.
Adding Verification Steps to a List
-
When a Verification List is created, no verification steps appear on the right side initially.
-
Click + Verification to open the Verifications popup.

-
Fill in the verification step details:
Field Description Verification Name Name of the verification step (e.g., Final Volume) Source Field Field that provides the source data (e.g., Volume Produced) Witnessed Check ✓ if step requires witness signature Active Check ✓ to activate this verification step -
Click Save after each verification step is added.
Duplicating a Verification List
- Select a Verification List from the list.
- Click the Duplicate button to open the Duplicate List popup.
- Type in a new name for the duplicated list.
- Click Create Duplicate button.
- The new Verification List is added to the list as "User Created" and can be modified and expanded.
Managing Verification Steps
In the Quality Assurance / Verifications window, each verification step displays the following columns:
| Column | Description |
|---|---|
| Verification Name | Name of the verification step (e.g., Final Volume) |
| Source Field | Field that provides source data for verification |
| Witnessed | Checkbox (√) if witness signature is required |
| Active | Checkbox (√) if the step is active |
| Action (Gear Icon) | Three options available |
Editing, Deleting, and Viewing Change Logs
Click the Gear Icon (Action) at the end of each verification step to access these options:

- Edit — Modify the verification step details. The Verifications window opens. Click Save after changes.

- Delete — Opens a Deletion Confirmation dialog with two buttons:
- DELETE — Permanently deletes the verification step
- CANCEL — Closes the dialog without deleting
- Change Logs — Opens the Record Modification Log window showing all changes made to the verification. Click X in the upper right corner to close.
Pharmacy Settings (System Foundation)
Pharmacy Settings provide the foundational templates and defaults required for system operation. These settings must be completed before using other areas of SiCompounding.
Best Practice: Enter all available and required data for each section and subsection to ensure proper system behavior, compliance, and reporting across SiCompounding.
Summary
- Define clear verification steps that align with your pharmacy's SOPs (Standard Operating Procedures).
- Use descriptive names for verification steps to avoid ambiguity (e.g., "Pharmacist Review" instead of "Check").
- Enable the Witnessed checkbox for critical steps requiring sign-off.
- Regularly review change logs to track modifications and ensure audit compliance.
- Use duplication to quickly create similar verification lists for different processes.
- Keep verification lists updated as your pharmacy's processes evolve.
This completes the step-by-step guide for Updating Verification Lists in SiCompounding.